Showing posts with label Ammo by Mig. Show all posts

Saturday, January 14, 2017

Diewaffenkammer's Tortoise

Wow it's hard to believe it's been two months since I made a post.  I've been swamped with work, the holidays, and even helped run my very first Bolt Action tournament.  I've played in a fair amount of tournaments, but this was truly a "first" for me to actually organize and run one. It was a blast!

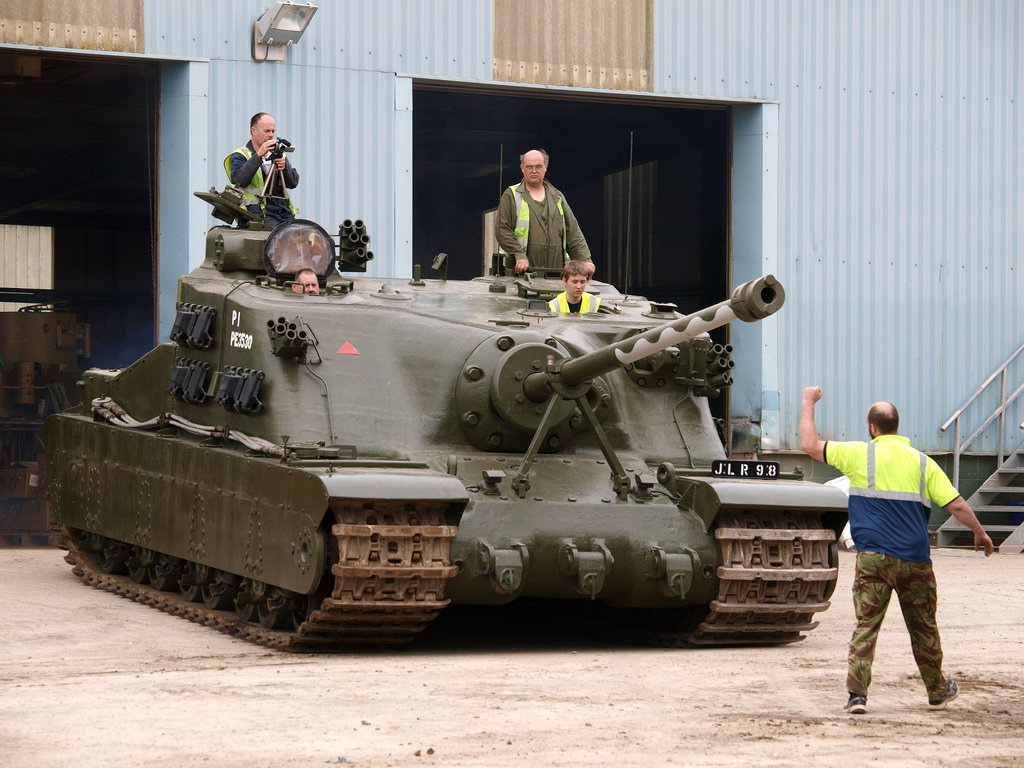
Today I'll be sharing a review of a very unusual tank: the Tortoise.  Today's model was brought to you by Jeff Trnka and Richard Humble.  The 1:56 model can be purchased at Die Waffenkammer.


The A39 Tortoise was a tank destroyer that was developed by the British towards the end of World War 2.  It was developed for the messy task of laying siege to heavily fortified areas and structures and relied on its armor rather than its speed.  The tank never saw combat with only a few of them built as prototypes by the end of the war.


The vehicle was crewed by a total of 7: a commander, driver, main gunner,  2 loaders serviced the 32-pounder gun and infantry would have been kept at bay by 2 machine gunners.  The gun was an adapted design taken from a 3.7 inch British anti-aircraft gun.  The gun was capable of tanking out a German Panther tank at roughly 1,000 yards.


Protecting such a gun was no small task as the developers wanted to keep the gun and its crew safe during siege conditions. The armor on the Tortoise ranges from 1.3 inches on the top to 7-9 inches thick on the front and sides.  The vehicle was 33 feet long by 13 feet wide and 9 feet tall.  It weighed 78 tons.

The kit by Die Waffenkammer certainly wasn't that big but it did have heft.  It's essentially a huge block of resin.  It arrived neatly packed in a box with a note from Jeff.  The entire kit is resin and my is the detail incredible on it. All of the pieces went together wonderfully.  There was no warping to contend with and very little clean up was needed.


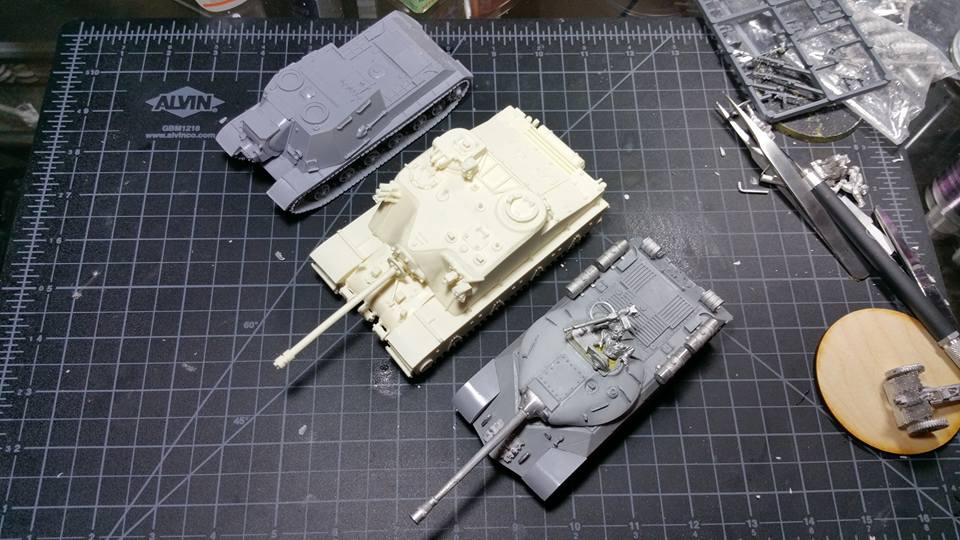
Here's a good judgment of the scale of the vehicle with it next to a Russian JS-3 and a ISU-152.


The Tortoise was a blast to paint.  I painted it as a gift to a friend who's been running a British army against me for some time.  I'm not sure how we'll run it in games, but I'm pretty sure we can create some house rules for it.  I wanted to emulate a subtle camouflage scheme I've seen in some articles about British armored divisions pushing towards Berlin.  I held off of weathering it too much, but I wanted to give the impression of it being in a wet environment at times and made sure to create plenty of rain/ grime streaks down the sides of the super structure.  I used a variety of paints, pigments, filters and washes by Ammo by Mig.


Verdict:

This kit is fantastic.  I loved building it and I especially loved painting it.  The only drawback I could see for some people would be that there are not any rules available for it in Bolt Action, however that shouldn't be an issue for people who enjoy making house rules.  The details and build quality is second to none especially considering it's for 1:56 scale.  This kit is fantastic

If you enjoyed the review, feel free to leave a comment below as it really helps the site out.  Additionally, if you'd like to pick up a Tortoise of your own, head on over to Die Waffenkammer or follow this link to the direct listing.

Until next time, have a great one.

Sunday, October 30, 2016

The Painting Guide for Rubicon’s 250 Alte

It’s been a while in the works due to life taking me for a spin, but I’m back with this tutorial walk-through on how I painted my Alte by Rubicon.  My methods of painting tend to leave my subject a bit grittier than most would leave their vehicles. Take what you will from this walk-through!

My goal with this vehicle is to emulate the appearance and condition a vehicle would appear to be while in service to the Desert Afrika Corps.

Keep in mind that I left the interior blank as I have a crew that I’m working on separately that will be placed, along with equipment inside of the vehicle.

Without further ado, we start the model off with quick bit of primer.  I tend to use the airbrush and apply Alclad’s black primer in two light passes.  It’s enough to give the paint something to adhere to, but it also preserves the details.


Once, the primer has cured for at least 12 hours, I apply a Tamiya’s German Grey.  I keep the tone dark and I do not apply any highlights as I want the darker paint to show through a bit once the sand color is applied.  Believe me, it’ll make sense in the later steps. Sadly, I forgot to take a picture of the vehicle in its grey state.

After the grey has cured, I applied Ammo’s Washable Sand in light passes over the vehicle.  You’ll want to keep the coverage a bit sporadic and hardly uniform as you’ll want some of the original color to show through.  The goal here is to emulate the paint job the crew applied while gearing up for the field.


After the paint has had time to dry a bit, I took a larger chisel-tipped brush and began to wear on the sand color to create breaks in the paint and soften its coverage.  In places where I took too much off, I followed up with an additional light coat of the washable sand color.


With the washable sand color weathered as much as I felt necessary, I sealed the model with a satin coat and let the model sit for at least 12 hours.  Once the satin coat was cured, I began the process of applying decals to the vehicle.


As the decals dried, I took the opportunity to begin painting the details and gear of the vehicle.  For colors, I used Scale 75’s ScaleColor range as I love how flat the colors dry. After I finished painting the small details, I clear-coated the model with an additional coating of satin and prepared to apply filters and washes.


From here, I did a bit of back and forth with adding filters and washes and backtracking if I felt the need.  I used filters and washes by Ammo and I even broke out the oil paints and enamel thinner.  I worked in small steps and made sure to let the model dry before applying additional filters and effects.  Once I was happy with the filters and various washes, I did a once-over with pin washes to really bring out the details in the vehicle.


Satisfied with the oils, washes, and filters, I began the process of adding elements such as subtle streaks, chips, and scuffs to the vehicle.  I did the streaking effects with Ammo products and used acrylic paints for the subtle chipping and scuffs.

As I was on the homestretch, I took the opportunity to look the vehicle over for anything that I may have missed.  Satisfied, I applied pigments to the model with the use of enamel thinner and pigments by Ammo.  I did a tiny brush-full of pigments to a bit of thinner to create a nearly clear wash.  I built this wash up around the vehicle where I wanted pigments to accumulate.


With the pigments in place, the Alte is now completed!


If you enjoyed the review, feel free to leave a comment below as it really helps the site out.  Additionally, if you'd like to pick up this reduced-fat version of a Hanomag, head on over to Rubicon or follow this link to the direct listing.

Thanks for looking!


Monday, August 22, 2016

Slow and Steady

Progress has been rather slow as of late due to scheduling conflicts and the works.  With my wedding only a few weeks out, I trust that it will only become a little more hectic!

I managed to get the initial coat of the washable sand applied to the Alte.  I'm in the midst of creating a full-length tutorial that will be published here in the next week or so.


Additionally, I broke out the dremel and decided to refit the 88mm to the PZ IV by lowering the deck down a bit.  I'm still on the fence with adding the shield (even though the rules give it to you) as I've seen the actual vehicle with and without the shield in place.  If did add the shield, it does obstruct the gun's ability to swivel.  I'll make a decision soon enough.


Thanks for looking,

Jake

Wednesday, August 17, 2016

And so it begins!

I'll be creating a step by step-by-step turorial of how to paint Rubicon's 250/1 Alte.  Despite the heat and humidity of yesterday evening, I managed to get a good application of Alclad black primer on the model.  I did have to contend a bit with the dreaded orange peel effect as my garage is rather warm, but I was able to knock it off with a light scrubbing with an old toothbrush.

Now to let it cure and I can begin the actual painting process!