Warlord’s JS-3 (Objekt 703/ Josef Stalin Tank 3) – A Review
Warlord recently released this pike-nosed monstrosity in an anticipation of Konflict ’47 and the appearance of late, late war tanks that will be making their way to Bolt Action 2nd edition. In this review, I’ll provide a brief history of the tank, features of the kit, and give a generalized walkthrough of the building process.
 |
| Photo courtesy of Wikipedia |
The JS-3, also known as Objekt 703, was one of the first
tanks developed by the Soviet Union to adopt a semi-hemispherical turret. It was developed very late in World War 2 and
left factory doors for deployment in May 1945.
Although it did not see combat during World War 2, it was said to be the
“strongest tank in the world” at the time of its release. The JS-3 was innovative with its soup-bowl
styled turret, low height, 122mm D25T gun, thick armor, and its well-angled pike
nose that earned the tank the nickname “Shcuka” (Pike). The JS-3 made its first appearance to the outside
world during the Allied Victory Parade on September 7, 1945. While being innovative, the tank was plagued
with problems ranging from limited gun depression, various mechanical issues,
and an issue regarding cracking in hull weld lines.
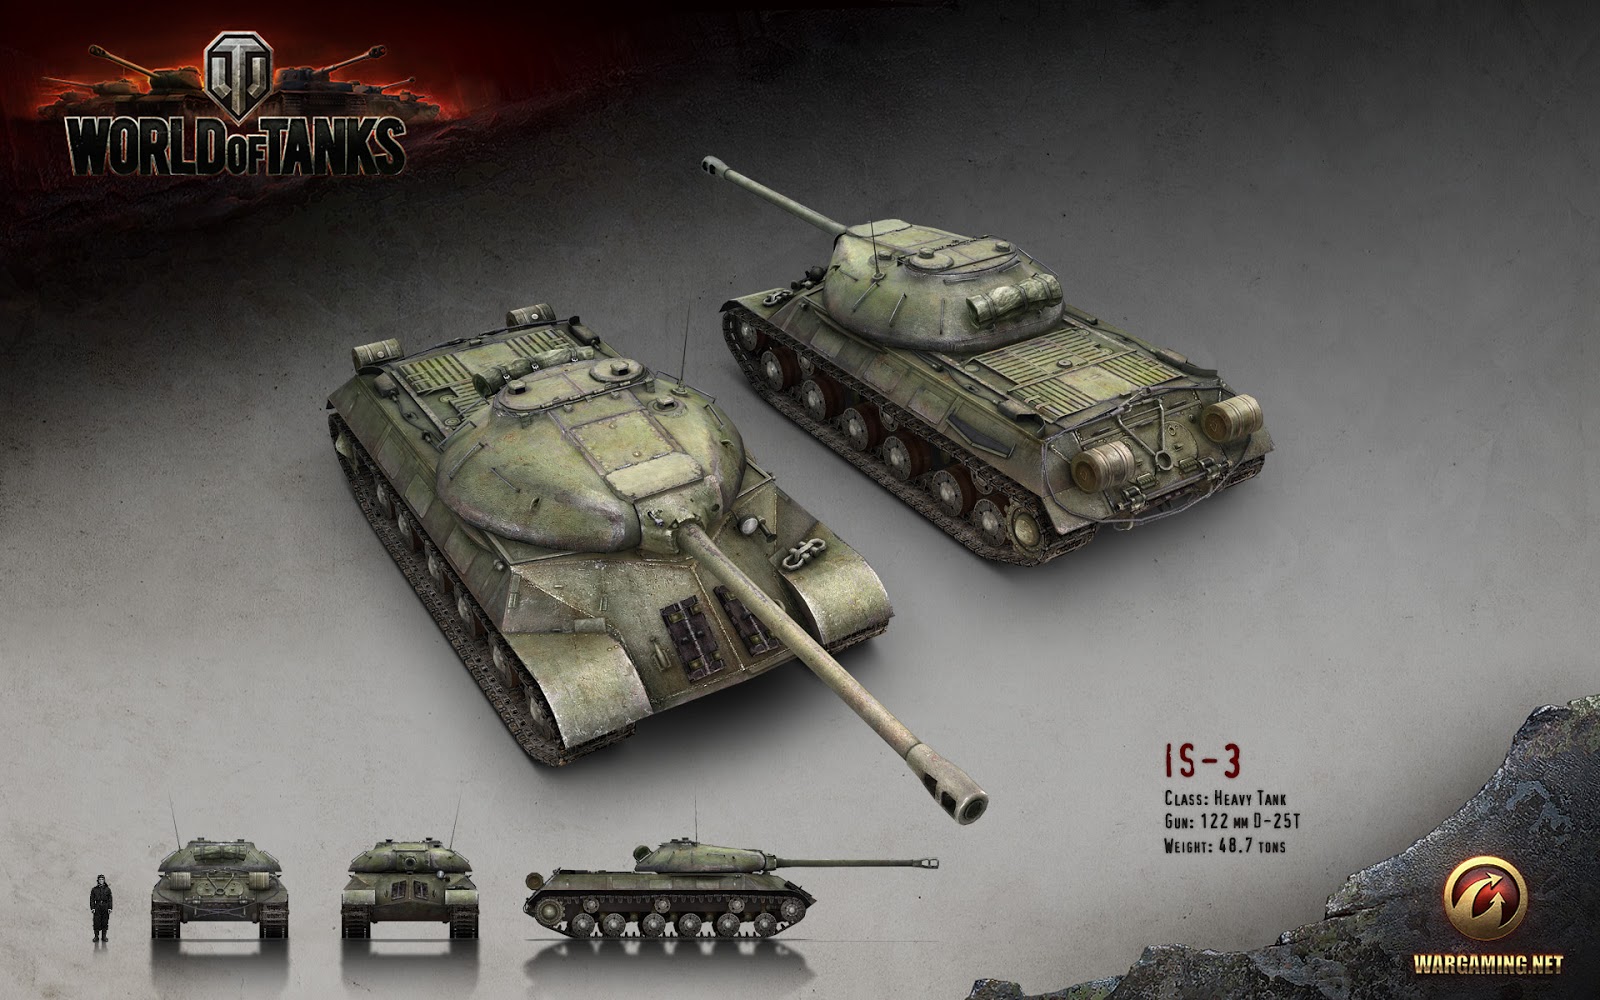 |
| Photo courtesy of World of Tanks/ Wargaming.net |
Released recently for the game Bolt Action, Warlord did a
great job bringing this tank to life.
Rules-wise it lives up to its reputation of being a hefty tank to brawl
with. Given a 12+ to penetrate the tank
from the front, the rules distinctly reflect the pike nose and the 60 to 230mm
of armor the tank sported. The armament
is no joke to mess around with as Shcuka is equipped with a heavy anti-tank gun
with its own special rule (HE 2D6 hits!) and a pintle-mounted dshk heavy
machine gun to spread love to planes, troops, and light armored vehicles. Russia’s fighting bear comes at a hefty price
though; if you’re looking to run this at a “regular” level, be prepared to pay
600 points for it.
Each JS-3 from Warlord is made to order. The kit is supplied with the hull, turret,
and tracks in resin. The barrel, heavy
machine gun, tank commander, fastening points, crew hatches, fuel barrels, and spare
tracks are cast in white metal. With the
majority of the tank in resin, there are actually very few pieces to this kit,
making assembly time relatively short.

Upon unwrapping Shcuka, I got the chance to scan the pieces over carefully. I was very impressed by the detail that Warlord managed to include with this kit. As it was resin, I did notice some slight warping with the tracks. Slight bends and warping are a common evil with resin kits; it’s certainly nothing to get upset about. To remedy this, I placed the two track pieces under warm water for 30 to 45 seconds.

With the pieces heated, I was able to place them on the main resin body of the tank and straighten them. To set the tracks to the hull, I used CA glue with some zipkicker to speed up the setting process. Once applied, you would never have guessed that the pieces had been slightly warped.


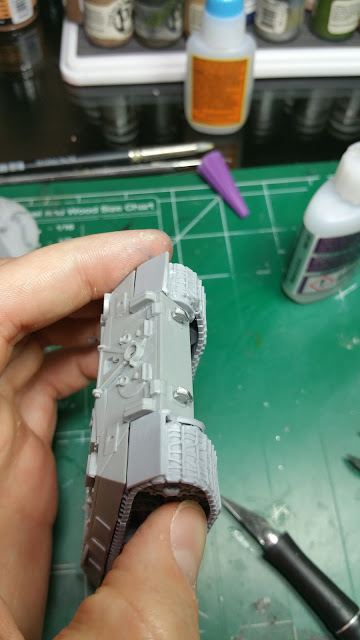
With the tracks in place, I moved onto the turret of the
vehicle. The first order of business was
to do away with the excess resin from the pour points on the turret. This was a quick fix with my dremel.


Once the excess resin was removed, I went to work on following
my OCD tendencies and actually magnetized the turret. I accomplished this by drilling hole in the
hull and then drilling a corresponding one in the turret. If you do this, be sure to make sure the
depth of the magnet in the Goldilocks zone.
If it’s too shallow, the magnets will stick out and the turret won’t sit
right; if it’s too deep, the magnets won’t be able to touch and your tank will
look like it just got ammo-racked if it tips over.


After the magnets were in place, I noticed that the turret
was too smooth to my liking. Russian
armor was notorious for its rough casting texture on its turrets. In effort to keep Gunzo Sangyo in business, I
reached for my Mr. Surfacer 500 and began to dab it on the tank. By dabbing the lacquer-based primer on the
model, it becomes slightly tacky and takes on a rough look to it. This is perfect for emulating the texture that
the rough sand molds left behind during the casting process. (This is a neat trick I learned from Mig
Jimenz of Ammo of Mig). Adding a subtle
texture adds a bit of character to the tank once paint and washes are applied.

With my texture fetish satiated, I turned my attention to
the fearsome 122mm D25T gun. Be it in plastic
or metal, odds are that a barrel will have a mold line. This barrel certainly had one so I went to
town on it with an Xacto knife and some fine grit sandpaper. With little effort, the mold line was gone
and I was on my way to my next task of fixing the barrel to the turret. I did this by using a healthy amount of CA
glue and zipkicker to fix the barrel in place.
I then followed up with some modeling putty and filled the gap using a
sculpting tool.


After the barrel was in place, I went about securing the
crew hatches and the tank commander himself.
I used some modeling putty to create a nice base for the hatches and the
figure. I did this so that the hatches
sit naturally and that the figure wouldn’t be “floating” inside of the tank. I may have been a little messy with the
putty, but it cleans up easily after it dries and can be removed with an Xacto
knife.


While I had the figure in place, I arranged the ring mount
and the dhsk heavy machine gun to the turret.
I did this as to check the amount of clearance I would have with the
figure in place. With the correct
spacing established, I glued the ring mount and the heavy machine gun in
place. The tank was now ready to turn
away unwanted solicitors at a moment’s notice.


With the turret correctly situated, I turned my attention to
the various bits around the tank starting with the improvised track armor. These were easy enough to clean up and glue
into place.


From there I attached the fastening points on the front and
rear of the tank.


After the fastening points, I turned my attention to the
fuel tanks situated around the tank. The rear ones went on easily enough.


The side ones were easy as well. I did have to remove some mold lines, but
they went off quickly enough.


And there you have it, Shcuka is ready for a fight. In all, the kit only took about 30 minutes to
build. I probably could have gone
faster, but I took my time with the putty and also adding some loving texture
to the turret of the tank.


Verdict:


While I love this tank and the amount of detail packed into
it, I’d say it’s not for the faint of heart if you can’t part with points when
creating a list. At a regular price of
600 points, many people will fail to regain color in their cheeks as they shove
on to finish a list. However, if you’re
up for scenarios, larger point games, or are an armor whore like me, then I
certainly suggest picking this tank up.
Warlord did an outstanding job of creating this tank at a 28mm scale and
I can’t wait to put it on the table. My
only regrets is that I wish I could use it against Stefan Kraut’s Tiger II or
throw it down against Andy Singleton’s Germans sometime in the near future.
If you enjoyed the review, feel free to leave a comment
below as it really helps the site out.
Additionally, if you'd like to pick up a JS-3 of your own, head on over
to Warlord Games or follow this link to the direct listing.
I’ll be following up with this post as I begin to paint it. In a future post, I will be reviewing one of
Rubicon’s new kits: the SdKfz 250/1 Alte!
Until next time, have a great one.


